
Table of Contents
- What You'll Need: Essential Home Brewing Equipment List
- Sanitization Tips for Home Brewers: The Step Beginners Skip
- Your First Brew Day: A Step-by-Step Home Brewing Walkthrough
- How to Bottle Home Brewed Beer Without Contamination
- Troubleshooting Off-Flavors and Common Beginner Mistakes
- Budget-Friendly DIY Hacks and Cleanup Efficiency
- Conclusion: Your First Batch Is Closer Than You Think
- Frequently Asked Questions
Last Updated: September 11, 2026
What You'll Need: Essential Home Brewing Equipment List
A simple home brewing guide for beginners starts with a short equipment list, not a shopping spree. The people who stick with the hobby bought the basics first and upgraded later. You need a fermenter, an airlock, a siphon, a hydrometer, and a large pot. Everything else can wait until batch two.
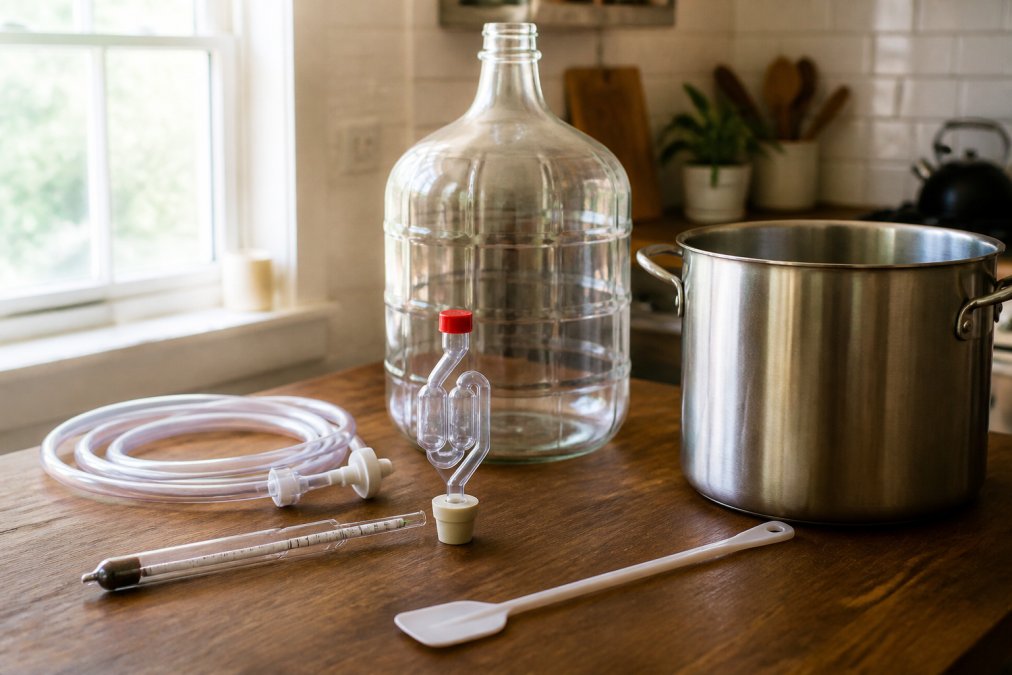
The Starter Kit: Fermenter, Airlock, and Carboy
The fermenter is where your beer lives for its first two weeks. A food-grade plastic bucket with a lid is the cheapest way in, and it works. A glass carboy lets you watch fermentation happen. The airlock is a one-way valve that lets carbon dioxide escape without letting oxygen in; skip it and you risk oxidation. A hydrometer measures specific gravity, telling you how much sugar is left and, later, your alcohol content.
Here's what the core kit actually looks like, with the sizes that matter:
| Item | What to Look For | Why It Matters |
|---|---|---|
| Fermenter | 23 L food-grade bucket or 19 L carboy | Leaves headspace for krausen; a 23 L bucket handles a 19 L batch comfortably |
| Airlock and stopper | 3-piece airlock with a drilled rubber stopper | Lets CO2 out, keeps oxygen and wild yeast in |
| Siphon | Auto-siphon with 1.5 m of food-grade tubing | Starts a flow without priming by mouth, which introduces bacteria |
| Hydrometer | Glass hydrometer plus a tall test jar | Tracks gravity so you know when fermentation is finished, not just quiet |
| Brew pot | 16-20 L stainless or enameled stockpot | Extract batches boil 10-12 L; a bigger pot leaves room to avoid boilovers |
| Thermometer | Instant-read or clip-on dial | Steeping and pitching both depend on temperature ranges |
| Bottling wand | Spring-tip wand with tubing | Fills bottles from the bottom, cutting oxygen pickup |
| Bottles and caps | 48 x 500 mL amber bottles, crown caps, capper | Amber glass blocks light; 500 mL bottles mean fewer to fill |
A note on pot size: a 16 L pot is the practical minimum for a 19 L extract batch, because you'll top up with water in the fermenter after the boil. If you already own a large canning pot, you likely have what you need.
Nice-to-Have Upgrades for Your Second Batch
Once you've finished one batch, you'll know what you actually want. Most beginners add a bottle filler, a dedicated brewing spoon, and a second fermenter for racking. A wort chiller speeds up cooling, but an ice bath in the sink works fine for a first attempt. The Brewers Association homebrewing resources maintain a useful overview of equipment categories if you want a second opinion before buying.
A few upgrades earn their place faster than others:
- Bottling bucket with a spigot: turns bottling from a two-person job into a one-person job.
- Second fermenter: lets you rack off the yeast cake and free up your primary for the next batch.
- Immersion wort chiller: cuts cooling from 30-45 minutes in an ice bath to roughly 10-15 minutes, which reduces the window for contamination.
- Bottle tree and sanitizer injector: speeds up bottling day more than almost anything else.
DIY Hacks That Lower the Barrier to Entry
Most guides hand you a shopping list. Fewer tell you what you can borrow from the kitchen:
- Stockpot: a large canning or soup pot you already own handles extract batches up to 19 L.
- Fermenter: a food-grade plastic bucket from a hardware store works if it's marked food-grade and you sanitize it properly. Avoid anything that held chemicals or fragrances.
- Ice bath: a sink or cooler filled with ice and water chills a 10-12 L boil in about 30-45 minutes. Stir the wort gently to speed it up.
- Bottle drying: a dishwasher rack or a clean plastic crate does the job of a bottle tree.
- Thermometer: an instant-read kitchen thermometer covers steeping and pitching temperatures.
What you should not substitute: anything that touches cooled wort. Sanitizer, food-grade tubing, and a clean fermenter are the three places where saving money costs you a batch.
Sanitization Tips for Home Brewers: The Step Beginners Skip
Sanitization is the difference between beer and regret. Wild yeast and bacteria will happily colonize your wort, and no amount of good ingredients will save an infected batch. Clean everything that touches your beer after the boil, and sanitize anything that touches it after cooling.
Cleaning vs. Sanitizing: What's the Difference?
Cleaning removes visible residue, oils, and grime using a detergent or oxygen-based cleaner. Sanitizing reduces microorganisms on a surface that's already clean to a level where they can't spoil your beer. You cannot sanitize a dirty surface. Clean first, then sanitize, every time.
- Fermenter and lid: clean after every use, sanitize before filling
- Airlock and stopper: sanitize before inserting
- Siphon, tubing, and bottling wand: sanitize immediately before use
- Bottles: clean and sanitize on bottling day, no shortcuts
- Your hands: yes, really
Your First Brew Day: A Step-by-Step Home Brewing Walkthrough
Brew day takes about three hours for a beginner extract batch, most of it waiting. Here's how to bottle home brewed beer successfully: get brew day right, and bottling becomes the easy part.
Steeping Grains, the Boil, and Chilling the Wort
- Heat 10-12 litres of water to roughly 70°C.
- Steep your specialty grains in a mesh bag for 20-30 minutes, then remove.
- Bring to a boil, add malt extract, and stir until fully dissolved.
- Add hops on schedule, typically at 60, 15, and 5 minutes remaining.
- Cool the wort to under 25°C as fast as possible.
The boil sterilizes your wort and extracts bitterness from the hops. Chilling stops hop isomerization and gets you to a temperature where yeast can survive. Treat everything post-boil as if it's already beer.
Pitching Yeast and Setting Up Fermentation
Yeast pitch is the moment your beer starts. Sprinkle dry yeast on the cooled wort, seal the fermenter, and fit the airlock. Fermentation typically runs 7-14 days at 18-22°C, with krausen forming within 24-48 hours. When the airlock slows and the krausen falls, take a hydrometer reading; two identical readings 48 hours apart means fermentation is done.
Government of Canada food safety guidance on home food preparation offers general hygiene principles that apply well to brewing.
How to Bottle Home Brewed Beer Without Contamination
Bottling is where most first batches go wrong. The beer is finished and vulnerable, and every bottle is a chance to introduce oxygen or bacteria. Work clean and work quickly.
Dissolve priming sugar in a small amount of boiling water, cool it, and add it to your bottling bucket. Rack the beer onto the sugar solution using your siphon, avoiding splashing. Fill each bottle to about 2.5 cm from the top, cap, and store at room temperature for two weeks to carbonate. Then chill one and try it. If it's flat, wait another week.
| Step | What to Do | Common Mistake |
|---|---|---|
| Priming | Dissolve sugar in boiled water | Adding dry sugar to bottles |
| Racking | Siphon gently, no splashing | Aerating the beer |
| Filling | Fill to 2.5 cm from cap | Filling too high or too low |
| Capping | Cap immediately after filling | Leaving bottles open |
| Conditioning | Two weeks at room temp | Drinking too early |
Troubleshooting Off-Flavors and Common Beginner Mistakes
Most off-flavors trace back to one of four causes: too much oxygen, too much heat, incomplete fermentation, or infection. Each has a distinct taste signature, so you can usually diagnose what went wrong by how the beer tastes.
Reading the Flavor: A Diagnosis Table
| What You Taste | Likely Cause | What to Do Next Time |
|---|---|---|
| Buttery or butterscotch | Diacetyl, from racking off the yeast too early | Leave the beer on the yeast 2-3 extra days after fermentation slows; a short warm rest helps the yeast clean it up |
| Green apple | Acetaldehyde, from incomplete fermentation | Give fermentation the full two weeks; don't cold-crash early |
| Wet cardboard | Oxidation, from splashing during racking or bottling | Siphon gently, fill bottles from the bottom with a wand, and cap immediately |
| Band-aid or medicinal | Infection, almost always a sanitization gap | Re-check every surface that touches cooled wort; replace scratched plastic fermenters |
| Harsh, solvent-like | Fermented too warm | Keep fermentation in the 18-22°C range; a cooler spot or a swamp cooler helps |
| Sour or tart | Wild yeast or bacteria | Sanitize more aggressively; replace any scratched or pitted plastic |
| Skunky | Light exposure | Use amber bottles and store them in the dark |
| Flat | Not enough priming sugar, or too cold to carbonate | Measure priming sugar by weight, and condition at room temperature |
The Four Root Causes, in Plain Terms
- Oxygen after fermentation: oxygen is fine before you pitch yeast, but after fermentation it stales beer. The fix is mechanical: siphon quietly, fill from the bottom, and cap right away.
- Heat: yeast produces clean beer in a narrow band. Above roughly 22°C, many ale strains throw solvent-like or fruity off-flavors. A cooler corner or a water bath with a frozen bottle swapped in daily keeps things in range.
- Incomplete fermentation: pulling the beer off the yeast too soon leaves acetaldehyde and diacetyl behind. Two identical hydrometer readings 48 hours apart is the only reliable signal that fermentation is done.
- Infection: wild yeast and bacteria colonize wort given the chance. Cleaning removes residue; sanitizing reduces microorganisms on a clean surface. You cannot sanitize a dirty surface.
Mistakes That Cost You a Batch
A common mistake is rushing the timeline. Give fermentation the full two weeks, and give bottles the full two weeks to condition. The single biggest improvement most beginners make is simply waiting longer.
Other patterns worth watching:
- Pitching yeast into wort that's too hot. Above roughly 25°C, you risk killing yeast or throwing off-flavors. Cool first, then pitch.
- Skipping the hydrometer. Airlock activity is not a fermentation gauge. Bubbles slow for many reasons, including a loose lid.
- Using dish soap on equipment. The fragrance and degreasers leave a film that kills head retention.
- Reusing scratched plastic. Scratches harbor bacteria that sanitizer can't reach. Retire scratched fermenters.
Government of Canada food safety guidance on home food preparation offers general hygiene principles that apply well to brewing.
Budget-Friendly DIY Hacks and Cleanup Efficiency
You don't need a dedicated brew space. A kitchen with a stove and a sink covers almost everything. A large stockpot you already own handles extract batches up to 19 litres, and a clean food-grade plastic bucket works as a fermenter if you sanitize it properly.
For cleanup, clean as you go. Rinse the fermenter the moment you rack out of it, and let bottles soak in warm water while you cap the last of the batch. Cleanup that takes 20 minutes on the day takes two hours the next morning.
For the drinking end of the process, a good mug matters more than people admit. The White Glossy Mug is sturdy, dishwasher-safe, and holds a full pour without feeling fragile, while the Enamel Mug suits anyone who drinks their home brew outdoors.


Conclusion: Your First Batch Is Closer Than You Think
The hardest part of home brewing is starting. Once you've sanitized your first fermenter and watched an airlock bubble, the whole process stops feeling intimidating. Gilded Grind's curated bundles are built for exactly this kind of ritual, whether you're pairing a finished home brew with a morning cup or exploring a new profile. Browse the collection and find the beans that match your next moment of savoring.
Frequently Asked Questions
What is the easiest home brew to make for a complete beginner?
A simple extract-based ale is the most forgiving starting point. You skip the mash and sparge steps, using malt extract instead, which cuts brew day to about two to three hours. Pale ales and amber ales ferment cleanly at room temperature and are ready to bottle in two weeks. Avoid lagers for your first batch since they need precise temperature control. Focus on nailing sanitization and fermentation temperature, and you will get a drinkable beer on your first try.
What essential equipment do I need to start brewing beer at home?
At minimum you need a fermenter (a food-grade bucket or carboy), an airlock and stopper, a large stockpot for the boil, a siphon and bottling wand, a hydrometer, sanitizer, and bottles with caps. A thermometer helps you hit the right yeast pitch temperature. Everything else, like a wort chiller or secondary fermenter, can wait until you have a few batches behind you. A starter kit bundles most of this and often costs less than buying each piece separately.
How do I ensure proper sanitization during the brewing process?
Clean first with warm water and a mild detergent, then apply a no-rinse sanitizer to every surface that touches wort or beer after the boil. This includes the fermenter, airlock, siphon, bottling wand, and bottle caps. Let the sanitizer sit for the contact time on the label, usually one to two minutes. Do not rinse with tap water afterward, as that reintroduces microbes. Mix a fresh batch of sanitizer on brew day and keep a spray bottle handy for quick touch-ups.
How long does the home brewing process take from start to finish?
Brew day runs about two to four hours depending on whether you steep grains or use extract. Fermentation takes one to two weeks for most ales. After bottling, condition the beer at room temperature for another two weeks to build carbonation. Total time from brew day to first pour is roughly four to five weeks. You can shorten the timeline slightly with a fast-fermenting yeast strain, but patience at the conditioning stage makes a noticeable difference in flavor.
Home brewing rewards patience more than equipment. If you're ready to build a coffee ritual around the same care you put into your beer, Gilded Grind offers a range of roast profiles from light to dark, convenient bundles, and a selection built for moments worth savoring. Get started with Gilded Grind and find the roast that fits your routine.


