
Last Updated: November 7, 2026
Quick Summary
To calibrate a digital coffee scale, enter the scale's calibration mode, place a reference weight of known mass on the platform, wait for the reading to settle, and confirm the value. Repeat with a second weight to verify the result. The phrase how to calibrate a digital coffee scale starts with checking whether your scale supports user calibration.
- Calibration resets the scale's internal settings, while an accuracy check only tests readings.
- Place the scale on a level counter away from vibration, heat, and wind.
- Use a certified calibration weight, or a coin of known mass weighed on a trusted scale.
- Recalibrate after moving the scale, after a bump, or when readings feel off.
- Many entry-level brew scales are check-only and cannot be user-calibrated.
Table of Contents
- What Scale Calibration Means and Why It Matters for Brewing
- Calibration Versus Accuracy Checks: What Is the Difference?
- Gathering Your Calibration Weight and Preparing the Scale
- Step-by-Step: How to Calibrate a Digital Coffee Scale
- How to Check Coffee Scale Accuracy Without Calibrating
- Why Your Coffee Scale Is Not Weighing Correctly
- How Often to Calibrate a Coffee Scale and Your Next Step With Gilded Grind
- Frequently Asked Questions
What Scale Calibration Means and Why It Matters for Brewing
Learning how to calibrate a digital coffee scale helps you get the same brew every time. Small errors in weight change how a cup tastes.
Calibration is the process of setting a scale so its readings match a known weight. You place a weight you trust on the scale, then adjust the scale until the display shows that exact number.
Consistency matters more than almost anything else in brewing. A 20-gram dose and a 22-gram dose can taste noticeably different, even with the same beans and grinder.
- Calibration sets the scale to a known reference weight
- Accurate weights make recipes repeatable
- A drifting scale quietly ruins good beans
Calibration Versus Accuracy Checks: What Is the Difference?
Calibration changes the scale. An accuracy check only tests it. Knowing which one you need saves time and avoids unnecessary adjustments.
Calibration resets the scale's internal settings.
An accuracy check is simpler. You place a known weight on the scale and read the display.
Calibrate when: the scale reads wrong, you moved it to a new spot, or it has been bumped or stored for a long time.
Check accuracy when: you want a quick confidence test before a brew session. No adjustments are needed.
Gathering Your Calibration Weight and Preparing the Scale
Before you start, gather a reference weight and a clean, flat surface. A certified calibration weight is a good choice.
Place the scale on a level counter away from vibration, heat, and wind. A ceiling fan or a nearby kettle can throw off readings.
Remove any cups, filters, or containers from the platform. Turn the scale on and let it show zero.
What if you have no calibration weight? Use a coin of known mass, such as a standard Canadian coin, weighed on a trusted kitchen scale.
Step-by-Step: How to Calibrate a Digital Coffee Scale
Follow these steps in order. Exact button labels vary by model, so check your manual if a step does not match your scale. Before you begin, confirm your scale actually supports user calibration, since many pocket and entry-level brew scales only allow an accuracy check.
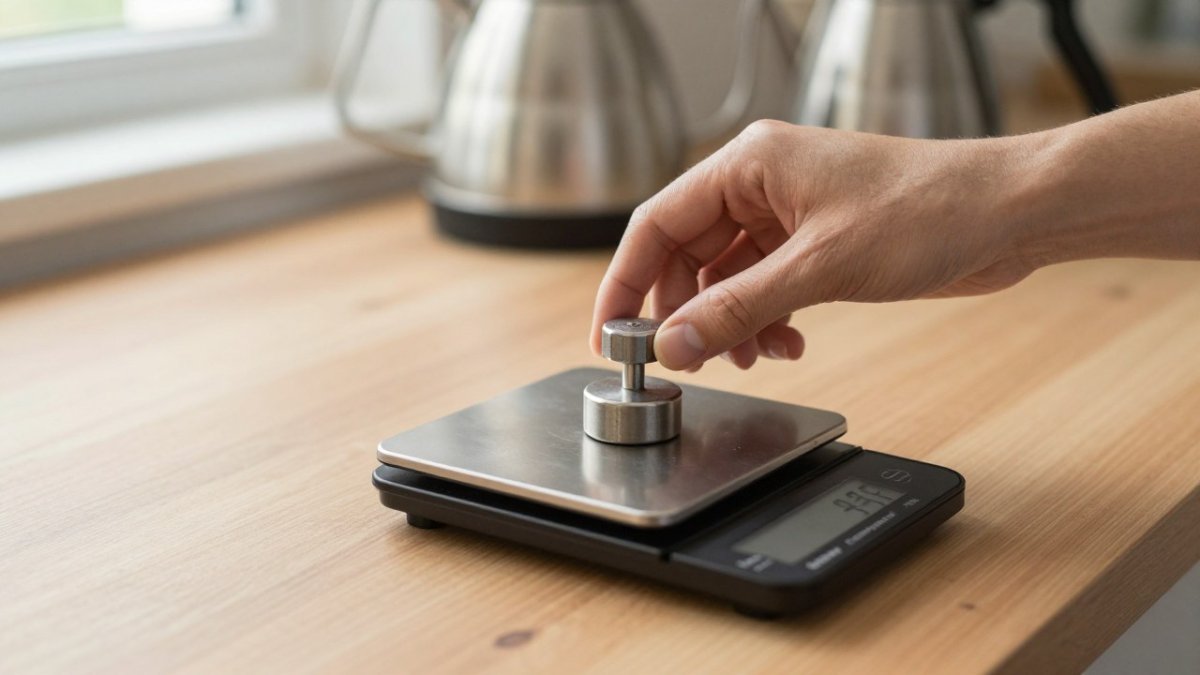
- Turn the scale on. Wait until it shows 0.0 with nothing on the platform.
- Enter calibration mode. Most scales need you to press and hold a button, often the tare or power button, until a calibration prompt appears. Some models require a two-button hold or a long press followed by a short press.
- Place the reference weight. Set the weight gently in the center of the platform. Avoid bumping it.
- Wait for the reading to settle. The display should stop changing before you confirm.
- Confirm the calibration weight value. Enter the exact weight of your reference, for example 100 g or 200 g, if the scale asks for it.
- Remove the weight and check zero. The display should return to 0.0. If it does not, repeat the process.
- Test with a second weight. Place a different known weight, such as 500 g, and confirm the reading is close.
Expected result: The reading matches your reference weight within a small margin. Your scale now stores the new settings.
Watch out: Do not calibrate while the scale is still warming up or while something rests on the platform. Both cause a wrong reading that the scale saves.
Common button sequences by scale type
Button sequences fall into a few patterns. Use this table to find the likely entry point for your scale, then confirm against the manual, since firmware revisions can change the sequence.
| Scale type | Typical entry sequence | Typical required weight | Notes |
|---|---|---|---|
| Basic brew scale with tare and power only | Hold tare for 3-5 seconds until a weight value flashes | 100 g or 200 g | Some models have no calibration mode at all |
| Scale with a dedicated CAL button | Press CAL, then place the weight when prompted | 100 g, 200 g, or 500 g | The prompt usually shows the target value |
| Scale with unit and tare buttons | Hold both buttons together for several seconds | 500 g | Common on larger kitchen-style platforms |
| Scale with a mode or function button | Long-press mode, then short-press to confirm | 200 g | Confirm the display shows the target before placing the weight |
| Scale with app pairing | Start calibration in the app, then follow on-screen prompts | 100 g or 500 g | The app usually locks the required weight |
Scales that cannot be user-calibrated
Many coffee scales are sealed at the factory and offer no calibration mode. On these, holding the tare button only tares; it never opens an adjustment screen. If no combination of button holds produces a flashing weight value or a CAL prompt, the scale is almost certainly check-only. In that case, run an accuracy check with a known weight and treat any drift as a reason to contact the manufacturer rather than to attempt an adjustment. Forcing a sequence that is not in the manual can clear stored settings or lock the scale.
After calibration
Recheck with a second weight at a different point in the range, because a scale can be accurate at 100 g and off at 500 g. Note the date and the weight used, so you can tell later whether drift is gradual or sudden. If the scale passes both checks, return it to its usual spot and tare before your first brew.
How to Check Coffee Scale Accuracy Without Calibrating
Sometimes you only want to confirm that your scale is still reading correctly. This takes about a minute and does not change any settings.
Place your reference weight on the scale and read the display. Remove it, then repeat with a second weight. Compare the readings to the true values.
If both readings land within a gram or so of the true weight, your scale is in good shape.
A small, steady error is easy to live with. A large or changing error means it is time to calibrate.
Why Your Coffee Scale Is Not Weighing Correctly
If your readings seem wrong, the cause is often simple. Start with the easy fixes before you assume the scale is broken. Work through the checks in order, because a failed calibration is usually caused by something earlier in the list.
- Uneven surface: Move the scale to a flat, level counter. A slight slope shifts weight toward one corner and produces readings that drift as you reposition a cup.
- Low batteries: Replace them, since weak power makes the display jump. A scale that flickers or restarts during calibration will usually fail the sequence.
- Drifting zero: Tare again before each weigh and check zero often. If zero creeps while the platform is empty, the load cell is settling or the surface is vibrating.
- Environment: Keep the scale away from heat, drafts, and vibration. A nearby kettle, a fan, or a phone vibrating on the same counter can all register as weight.
- Recent knocks: A drop or bump can shift calibration, so recalibrate after any impact.
- Overload: Placing more than the scale's rated capacity can trigger an error and, on some models, bend the load cell. Remove the load, restart, and check against a known weight before trusting it again.
Reading failed-calibration prompts
When a calibration attempt fails, the scale usually tells you why through a short prompt or code. The exact wording varies, but the patterns are consistent.
| What you see | Likely cause | Fix |
|---|---|---|
| A weight value flashes and does not advance | The scale is waiting for the reference weight, or the weight is below the minimum it accepts | Place the exact weight the display shows, centered on the platform |
| The display returns to 0.0 immediately after you place the weight | The weight is too light for the calibration point, or it was placed before the prompt appeared | Restart the sequence and wait for the prompt before loading |
| An error code appears and the scale powers off | Low batteries or an overload during the sequence | Fit fresh batteries, remove the load, and restart |
| The sequence completes but the reading is still wrong | The reference weight is not what the scale expects, or the surface is unstable | Recheck the weight's true value and move to a level, vibration-free counter |
| The scale will not enter calibration mode at all | The model is check-only, or the button hold is too short | Confirm the sequence in the manual before assuming a fault |
When to stop troubleshooting
If the scale passes an accuracy check at one weight but fails at another, or if readings change each time you place the same weight, the load cell may be damaged. Persistent errors after a fresh set of batteries, a level surface, and a correct reference weight point to a fault that needs service from the manufacturer rather than further calibration attempts. Repeated failed calibrations can also overwrite a working setting, so stop after two unsuccessful attempts and check the basics again.
How Often to Calibrate a Coffee Scale and Your Next Step With Gilded Grind
Calibrate your scale whenever you move it, after a bump, or when readings feel off. For most home brewers, a quick accuracy check once a month and a full calibration every few months works well. Heavy daily use may call for more frequent checks.
Your scale is only as useful as the coffee you weigh. Fresh, well-roasted beans reward precise dosing, and our Huila Colombia Dark Roast Ground Coffee is a good one to test your setup with. For a deeper look at choosing beans, read our guide to the best coffee beans for home brewing. Once you are dialed in, you can explore a specialty coffee subscription to keep fresh beans arriving on a schedule that suits you.

Steady weights lead to steady cups. Start with a quick accuracy check today, and your next brew will taste better for it.
Frequently Asked Questions
How do you calibrate a digital coffee scale?
Turn the scale on and let it warm up, then place it on a flat, stable surface away from drafts. Enter calibration mode by following your model's manual, which usually means holding the power or tare button until the display prompts you. Place a known calibration weight, such as a 100 g or 200 g reference, on the platform when the scale asks for it. Wait for the reading to settle, then remove the weight when prompted. Check that the scale now reads the known weight correctly, and repeat with a second weight if your model supports it.
Do all digital coffee scales have a calibration mode?
Most digital coffee scales include a calibration mode, but the way you reach it differs between brands and models. Some require holding a button during power-on, while others use a menu accessed through the tare or power key. Check your manual for the exact sequence. If your scale has no calibration mode at all, you can still verify its accuracy by weighing a known reference weight and comparing the reading against it.
What weight should I use to check a coffee scale?
A certified calibration weight is the most reliable choice. Common values for home coffee scales are 100 g, 200 g, and 500 g, which cover the range most brewers use for doses and yields. Choose a weight close to the amounts you weigh most often, such as an 18 g espresso dose or a 300 g pour-over brew. If you do not have a calibration weight, a precisely measured item of known mass can serve as a rough check, though it will not be as dependable.
Can I calibrate a coffee scale without calibration weights?
You can perform a basic check without dedicated calibration weights by using everyday items of known mass, such as a sealed package whose weight is printed on the label. This will show whether the scale is roughly accurate, but it cannot set a precise calibration. For reliable results, use graded calibration weights. Calibration weights are the only way to set the scale to an exact reference point.


