
Table of Contents
- What You'll Need Before You Start
- Coffee Brewing Ratios for Beginners
- The Best Water Temperature for Coffee
- Coffee Extraction Basics: Why Your Cup Tastes the Way It Does
- Step-by-Step: How to Brew Better Coffee at Home
- How to Store Coffee Beans So They Stay Fresh
- How to Brew Better Coffee at Home on Any Budget
- Common Mistakes That Ruin Home Brewing
- Frequently Asked Questions
Last Updated: September 29, 2026
What You'll Need Before You Start
Learning how to brew better coffee at home starts with a short list of gear, not a big budget.
Here's your starter kit:
- A burr grinder. Blade grinders chop unevenly. Burrs give you consistent particles.
- A digital scale. Weighing beans in grams beats scooping every time.
- A gooseneck kettle. Slow, steady pouring controls your extraction.
- Filter paper or a metal filter. Match it to your brewing method.
- Fresh coffee beans. Whole bean, recently dated, stored away from light and air.
Coffee Brewing Ratios for Beginners
Coffee brewing ratios for beginners come down to one simple starting point: 1 gram of coffee to 15 to 17 grams of water. That's your baseline.

Here's how to shift the ratio:
- Want it stronger? Drop to 1:15. Add more coffee, not less water.
- Want it lighter? Move to 1:17. Same coffee, more water.
- Brewing a large batch? Keep the ratio steady and scale both numbers.
The Golden Ratio and How to Adjust It
The "golden ratio" is a nickname for that 1:15 to 1:17 range. It works because it balances coffee strength against water volume.
The Best Water Temperature for Coffee
The best water temperature for coffee is between 90°C and 96°C. Water that's too cool under-extracts; water that's boiling scorches the grounds and adds bitterness.
Coffee Extraction Basics: Why Your Cup Tastes the Way It Does
Coffee extraction basics explain almost everything about why your cup tastes the way it does. Extraction is the process of pulling soluble flavor compounds out of ground coffee using water. Think of each ground particle as a tiny package of dissolved solids, and water as the solvent doing the unpacking.
-
First out: fruity and acidic compounds, plus salts. These dissolve fast.
-
Next out: sugars and the sweetness that balances acidity.
-
Last out: bitter, dry, and woody compounds that need more time and heat.
-
Grind size sets the surface area. More surface area means faster extraction.
-
Temperature sets the energy. Hotter water dissolves compounds more aggressively.
-
Contact time sets the total window. Longer contact pulls more out.
Under-Extracted vs. Over-Extracted: A Taste Guide
Under-extracted coffee tastes sour, sharp, and thin. Water moved too fast, was too cool, or didn't have enough contact time, so it stopped before the sugars arrived.
| What You Taste | Likely Cause | The Fix |
|---|---|---|
| Sour, salty, weak | Under-extracted | Grind finer, raise temp slightly |
| Bitter, dry, harsh | Over-extracted | Grind coarser, lower temp |
| Sour and bitter together | Uneven grind | Upgrade to a burr grinder |
| Weak but not sour | Too little coffee | Tighten your ratio |
| Muddy, silty | Too fine a grind | Coarsen and slow your pour |
| Flat, papery, hollow | Stale grounds | Grind right before brewing |
Build Your Palate: Acidity, Body, and Sweetness
Most guides stop at "trust your taste." That's not actionable if you've never been taught what to taste for. Sensory training is the skill that makes every other adjustment faster, and it costs nothing.
Pour Over Coffee Box | Med-Dark →
Taste your next cup against three dials:
- Acidity is the bright, juicy sensation at the front of your tongue, think citrus or berry, not sourness. Too much reads as sharp; too little reads as flat.
- Body is the weight and texture on your palate, from tea-like and thin to syrupy and coating. It comes mostly from dissolved solids and oils.
- Sweetness is the roundness in the middle of the sip that balances acidity. It's the first thing to disappear when you over-extract.
Step-by-Step: How to Brew Better Coffee at Home
The core method for how to brew better coffee at home is the same across styles: weigh, heat, bloom, pour, and time it. Master that flow and every method gets easier.
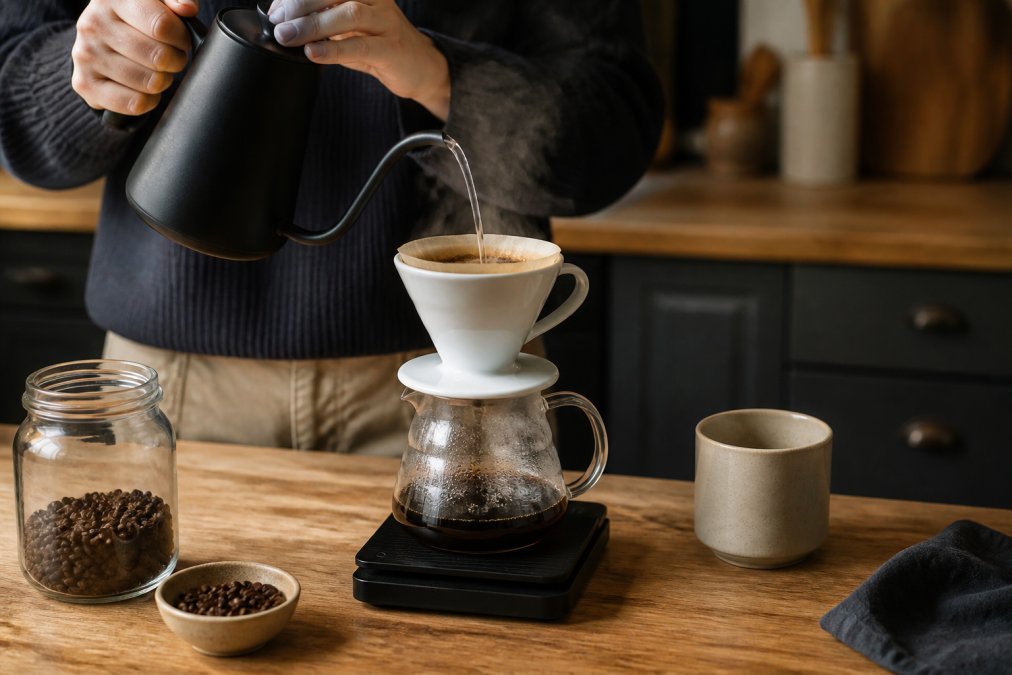
Pour-Over Method
- Heat water to 93°C.
- Weigh 20 grams of coffee and grind it medium-fine.
- Place a filter in your dripper and rinse it with hot water.
- Add the grounds and pour 40 grams of water to bloom. Wait 30 seconds.
- Pour slowly in circles until you reach 320 grams total.
- Aim for a total brew time of 2:30 to 3:00.
The bloom releases trapped gas so water can reach the grounds evenly. Skip it and your cup tastes flat.
French Press Method
- Heat water to 95°C.
- Weigh 30 grams of coffee and grind it coarse.
- Add grounds to the carafe and pour in 480 grams of water.
- Stir gently, then wait 4 minutes.
- Press the plunger down slowly and pour.
French press is immersion brewing, so grind consistency matters less than in pour-over. It's the forgiving method for busy mornings.
How to Store Coffee Beans So They Stay Fresh
How to store coffee beans so they stay fresh comes down to four enemies: air, light, heat, and moisture. Beat all four and your beans taste better for longer.
- Keep beans in an airtight, opaque container
- Store away from the stove and direct sunlight
- Buy whole bean and grind right before brewing
- Skip the fridge; use the freezer only for long-term storage
- Check the roast date, not just the best-before date
How to Brew Better Coffee at Home on Any Budget
You can brew better coffee on a modest setup or a serious one. The difference is how much control you want, not whether good coffee is possible. The trap most beginners fall into is buying gear in the wrong order, spending on a dripper before fixing the grinder, or buying a scale last when it should come first.
Starter Setup
A hand burr grinder, a digital scale, and a pour-over cone or French press. This covers the essentials and costs the least.
- What it fixes: Even particle size, repeatable ratios, and control over contact time.
- What it doesn't: You'll hand-crank every dose, and a basic hand grinder struggles with very fine settings.
- Best for: Anyone testing whether they'll stick with the habit before spending more.
Mid-Range Setup
An electric burr grinder and a temperature-controlled kettle. Fewer variables, faster mornings.
- What it fixes: Grind consistency at speed, plus precise water temperature instead of the boil-and-wait guess.
- What it doesn't: You're still managing pour rate by hand, which is the hardest variable to repeat.
- Best for: Daily brewers who want consistency without a ritual.
Pro Setup
A precision grinder with stepped or stepless adjustment, a brew scale with a built-in timer, and a gooseneck kettle. This is for people chasing repeatable results.
- What it fixes: Every variable you can measure, dose, yield, temperature, and time, so a good cup becomes a repeatable one.
- What it doesn't: It won't rescue stale beans or bad water. Gear amplifies good inputs; it doesn't replace them.
Where Your Money Actually Changes the Cup
If you're upgrading one thing at a time, this is the order that matters most:
- Grinder first. It's the single biggest lever on extraction evenness.
- Scale second. Weighing in grams turns a lucky cup into a repeatable one.
- Kettle third. Temperature control removes a whole class of bitterness problems.
- Brewer last. A different dripper changes the style of the cup, not the quality of it.
Common Mistakes That Ruin Home Brewing
Most home brewing problems trace back to a handful of repeatable mistakes. Fix these and your cup improves fast.
- Grinding too far ahead. Ground coffee goes stale in hours, not weeks.
- Skipping the scale. Eyeballing coffee leads to inconsistent cups.
- Using boiling water. It scorches grounds and adds bitterness.
- Ignoring the bloom. Trapped gas blocks even extraction.
- Dirty equipment. Old oils turn rancid and taint every cup.
Frequently Asked Questions
What is the most effective way to brew better coffee at home?
The most effective approach combines three things: a consistent coffee-to-water ratio (start with 1:15), water between 90-96°C, and fresh whole beans ground just before brewing. A burr grinder and a digital scale matter more than an expensive machine. Pour-over and French press both deliver excellent results once you control these variables. Focus on one method, weigh your inputs, and adjust based on taste rather than guessing.
What is the 15-15-15 coffee rule?
The 15-15-15 rule is a simple memory aid: use a 1:15 coffee-to-water ratio, brew for about 15 minutes total, and drink within 15 minutes of brewing. In practice, the 15-minute brew time applies to cold brew or immersion methods, not pour-over. For hot brewing, a 1:15 ratio with a 3-4 minute brew time works well. The core principle is consistency: same ratio, same timing, repeatable results.
How does water temperature affect coffee extraction?
Water temperature controls how quickly compounds dissolve from the grounds. Water that is too cool (below 88°C) under-extracts, leaving coffee sour and thin. Water that is too hot (above 96°C) over-extracts, pulling out harsh bitterness. The sweet spot for most home brewing is 90-96°C. If you do not have a variable-temperature kettle, boil water and let it rest for 30-60 seconds before pouring.
Why is the coffee-to-water ratio important for home brewing?
The coffee-to-water ratio determines strength and balance. Too little coffee and the cup tastes weak and watery; too much and it becomes muddy and bitter. A 1:15 ratio (20g coffee to 300ml water) is a reliable starting point for most methods. Adjust from there: use 1:14 for a bolder cup or 1:16 for a lighter one. Weighing with a scale gives you repeatable results that scoops cannot match.
Brewing a truly great cup at home takes practice, and the variables never stop shifting. Gilded Grind makes that easier with a curated range of premium, nature-inspired beans, from light to dark roast profiles, plus convenient bundles for anyone who wants quality without the guesswork. Our freshly brewed selection is built for people who treat their morning coffee as a moment worth savoring. Get started with Gilded Grind and taste the difference a better bean makes.


