
Table of Contents
- Why Descaling Your Automatic Coffee Machine Matters
- Choosing an Automatic Coffee Machine Descaling Solution
- Step-by-Step: How to Descale an Automatic Coffee Machine
- How Often to Descale a Coffee Machine
- Rinsing, Flushing, and the First Cup After Descaling
- When the Coffee Machine Descaling Light Won't Turn Off
- Protecting Your Machine Between Descalings
- Pairing a Clean Machine With Fresh Beans
- Frequently Asked Questions
Last Updated: October 29, 2026
Why Descaling Your Automatic Coffee Machine Matters
Learning how to descale an automatic coffee machine is the single most useful maintenance skill you can pick up. Scale is the hard, chalky film that hot water leaves behind inside your machine.
Your machine heats water hundreds of times a week. Every one of those cycles leaves a little mineral residue.
The fix is simple. A proper descaling solution dissolves those minerals so the machine can flush them away.
Signs Your Machine Needs Descaling
Most machines tell you before the coffee does. Watch for these clues:
- The maintenance indicator or descaling light comes on
- The flow rate drops and shots take longer to pull
- The machine sounds louder, with a strained pump pressure
- Coffee tastes flat, chalky, or slightly metallic
One or two of these is a nudge. Three or more means stop brewing and descale today.
Choosing an Automatic Coffee Machine Descaling Solution
The right automatic coffee machine descaling solution depends on what your maker allows. There are two main families: natural options and commercial descaling agents.
Citric acid is the most common natural choice. It is a mild acidic solution that breaks down mineral buildup without harsh fumes.
Commercial solutions are formulated for specific machines.
Check your manual first. Some makers require their own branded solution to keep the warranty valid.
Can You Use Vinegar to Descale a Coffee Machine?
Yes, white vinegar can descale a coffee machine, but with real limits. It is a cheap, effective acidic solution for limescale and calcium deposits.
The catch is smell and risk. Vinegar leaves a strong odor that can linger in the water chamber and taint the next few cups.
Use it only if your manual allows it. Dilute it, run a full rinse cycle afterward, and never mix vinegar with a commercial descaling solution.
Step-by-Step: How to Descale an Automatic Coffee Machine
Always follow your maker's specific steps.
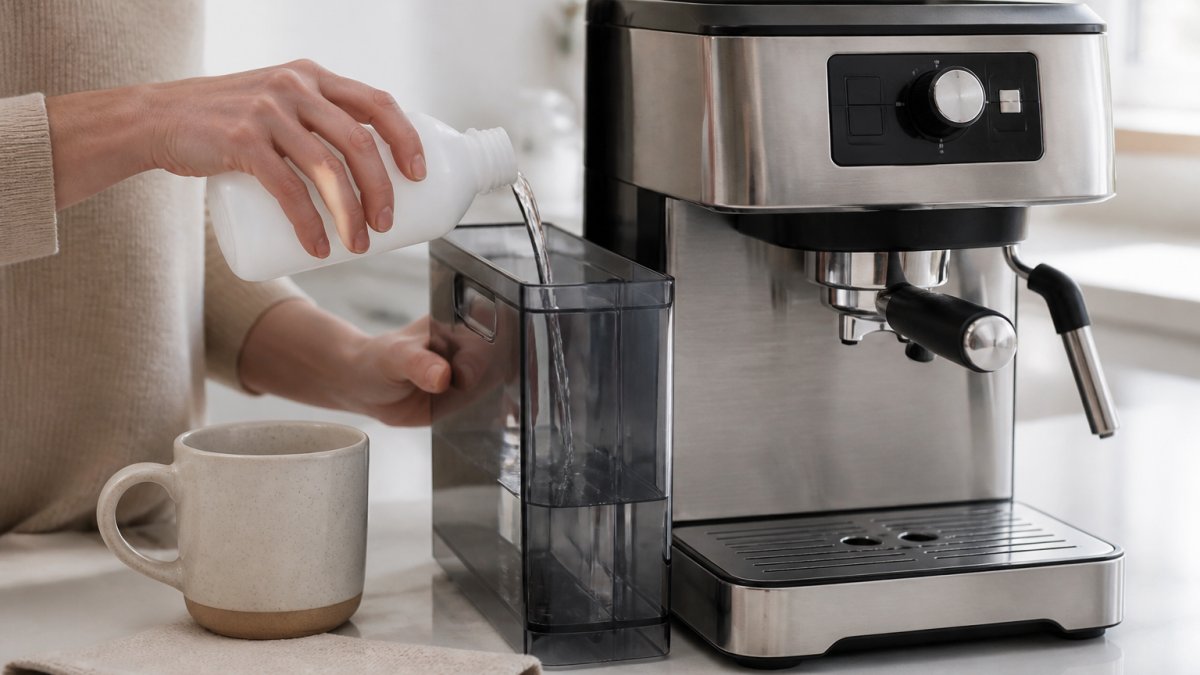
- Empty the machine. Remove the water reservoir, dump old water, and empty the carafe or drip tray. Pull the brewing unit if your model allows it and rinse it under warm water, loose grounds left in the unit can clog the descale path.
- Mix the solution. Add the descaling solution and fresh water to the reservoir at the ratio your manual states. Never guess the ratio: too weak and the acid cannot dissolve calcium deposits; too strong and it can stress seals.
- Start the cycle. Press the descaling program or automatic cycle button. Place a large container under the spout, a 1 L pitcher is usually enough for a mid-size super-automatic, but check your manual.
- Let it work. The machine will push the solution through the thermal block and brewing unit. Most cycles pause to let the acid soak; do not skip or shorten those pauses, because the soak is what actually breaks down limescale.
- Dump the waste. Empty the container as it fills. Never reuse the used solution, the dissolved minerals are still in it.
- Rinse the reservoir. Fill it with clean water and run the rinse cycle the machine prompts. Some machines require two or three rinse reservoirs before the cycle completes.
What the Blinking Light or Error Code Means
Most super-automatics do not just say "descale", they flash a specific indicator or show a code. The pattern is consistent across brands even when the symbols differ:
- A steady descale icon or a "descale" message means the machine has counted enough brew cycles or liters since the last cycle. Run the program.
- A flashing descale light paired with a paused brew usually means the cycle was interrupted. Top up the reservoir, empty the drip tray, and restart the program from the beginning.
- A code that appears only during descaling (often a two- or three-digit number in the display) typically points to a sensor that has not seen the rinse water pass. Check that the reservoir is seated and the water level sensor is clean.
- A code that persists after two full cycles is usually a sensor fault, not a scale fault. Stop descaling and contact the manufacturer, repeating the cycle will not clear it.
If the Cycle Stops Halfway
An interrupted descale is the most common reason a machine refuses to reset. The fix is almost always mechanical, not chemical:
- Reservoir not seated: many machines pause the cycle if the reservoir is lifted even slightly. Push it fully home.
- Drip tray full: a full tray can block the reset on models that route waste through it. Empty and reseat it.
- Water level sensor: mineral film on the sensor can make the machine think the reservoir is empty. Wipe the sensor with a soft damp cloth.
- Power interruption: if the machine lost power mid-cycle, it may need the descale program restarted from step one rather than resumed.
If the cycle still will not complete after these checks, run a plain water rinse cycle first, then repeat the descaling program. That sequence clears most stuck states without a service call.
How Often to Descale a Coffee Machine
How often you descale a coffee machine depends on water hardness and how much you brew. Hard water leaves scale accumulation faster, so those machines need attention sooner.
As a general guide:
- Soft water, light use: every 3 to 6 months
- Hard water or heavy daily use: every 4 to 8 weeks
- Whenever the machine prompts you: always follow the light
Test Your Water Hardness First
A generic schedule is a starting point, not a plan. The single most useful thing you can do is test your water, because two households brewing the same number of cups can need descaling on very different schedules.
A simple test strip is enough. Dip it in a glass of tap water, wait the time stated on the pack, and compare the color to the chart. Most strips report hardness in one of two ways:
- Milligrams per liter (mg/L) of calcium carbonate, the number most municipal water reports use.
- Grains per gallon (gpg), common on strips sold for home use. Roughly, 1 gpg equals about 17 mg/L.
A common pattern is:
- Under about 60 mg/L (soft): descale every 4 to 6 months, or when prompted.
- About 60 to 120 mg/L (moderately hard): every 2 to 3 months.
- About 120 to 180 mg/L (hard): every 4 to 8 weeks.
- Above about 180 mg/L (very hard): monthly, and consider filtered water.
These are starting points. Your machine's own counter, most super-automatics track liters brewed since the last cycle, is the more accurate trigger, and the light should always win over the calendar.
What Changes the Schedule
Beyond hardness, a few factors move the interval:
- Brew volume: a machine making ten cups a day accumulates scale far faster than one making two.
- Steam and hot-water use: the steam wand and hot-water spout pull from the same boiler, so heavy milk-drink use speeds buildup.
- Standby temperature: machines that keep water hot around the clock cycle more water through the thermal block than machines that heat on demand.
- Filtration: a filtration system or filtered water slows scale accumulation and can stretch the interval, but it does not eliminate the need to descale.
Why the Light Beats the Calendar
Your machine counts what you actually do, not what you planned to do. If you brew a heavy week and the descale light comes on early, trust it. If you go on holiday and the light stays off, there is no need to descale on schedule just because the calendar says so.
Use your water hardness reading to set a starting schedule, then let the machine's own descale light override it.
| Water hardness | Descale interval |
|---|---|
| Soft water, light use | Every 3 to 6 months |
| Hard water or heavy daily use | Every 4 to 8 weeks |
| Under about 60 mg/L (soft) | Every 4 to 6 months, or when prompted |
| About 60 to 120 mg/L (moderately hard) | Every 2 to 3 months |
| About 120 to 180 mg/L (hard) | Every 4 to 8 weeks |
| Above about 180 mg/L (very hard) | Monthly, and consider filtered water |
Rinsing, Flushing, and the First Cup After Descaling
Rinsing is not optional. Any residue left behind will end up in your cup. Run the flush and rinse cycle until the water runs clear and tasteless.
- Fill the reservoir with fresh water and run one full brew with no coffee
- Wipe the milk wand and steam wand with a damp cloth
- Run a short steam burst to clear the wand
- Taste a small cup before you commit to a full one, or serve it in a White Glossy Mug
That first cup is also your post-descaling taste test. Browse our coffee types to pick what goes in it. It should taste clean and sweet, not sour or chemical. If it tastes off, run one more rinse.
When the Coffee Machine Descaling Light Won't Turn Off
A stubborn coffee machine descaling light won't turn off for one of a few reasons. The most common is that the automatic cycle was not fully completed.
Work through these fixes:
- Finish the full cycle. Many machines need the entire rinse sequence, not just the descale run, before the light resets.
- Refill the reservoir. A low water chamber can pause the cycle and hold the light on.
- Check the drip tray. A full tray can block the reset.
- Run it again. If the light stays on, repeat the descaling program from the start.
If the light stays on after two full cycles, contact the manufacturer. It may be a sensor issue, not a scale issue.
Protecting Your Machine Between Descalings
For the beans themselves, our guide on how to keep coffee beans fresh longer covers storage that protects flavor between cleanings. If you want to understand how water shapes the cup, read how water quality reshapes espresso flavor.
Pairing a Clean Machine With Fresh Beans
A descaled machine deserves good coffee. Find the best coffee beans for automatic machines to match your super-automatic. Clean internal components and steady pump pressure let the brewing performance show what your beans can really do.
Our range runs from the bright, floral notes of Yirgacheffe Ethiopia to the deep richness of Sumatra G1.
Frequently Asked Questions
How do I know when my automatic coffee machine needs descaling?
Most machines signal it with a descaling light, but watch for slower flow rate, weaker crema, a lukewarm cup, or a faint chalky film in the water reservoir. These point to mineral buildup in the thermal block and brewing unit. If you notice any of these before the light comes on, run a descaling cycle rather than waiting.
Can I make coffee immediately after descaling?
Run a full rinse cycle first. After descaling, flush the water reservoir with fresh water and run the machine's rinse or flush program until the water runs clear and odor-free. Pour the first cup away, then brew. Skipping the rinse leaves acidic residue that will show up in the taste of your next coffee.
How long does it take to descale an automatic coffee machine?
Plan for 30 to 45 minutes start to finish. The descaling cycle itself usually runs 15 to 25 minutes, and the rinse and flush steps add another 10 to 20. Machines with an automatic cycle handle most of it unattended, but stay nearby to refill the water chamber when prompted.
What should I do if the descaling light won't turn off after a full cycle?
Check that you completed the entire program, including the rinse phase, since many machines only reset the maintenance indicator at the end. If the light stays on, run the descaling cycle once more with a fresh solution, confirm the water reservoir is filled to the marked line, and consult your model's manual for a manual reset sequence.
Your machine works hard for every cup. Give it the care it needs, then fill it with beans worth the effort. Gilded Grind offers a curated collection of premium roasts and convenient bundles, with a range of roast profiles from light to dark to suit your taste. Get started with Gilded Grind and turn your daily brew into a moment worth savoring.


